Need a quick and easy gift? Several of my quilting buddies have been making these cute little wine glass coasters so I decided to make a few myself. Even though we are not wine drinkers, we have always enjoyed having sparkling cider for holiday meals, etc. Even sparkling cider tastes better in fancy wine glasses. :) :)
Lay one 4 1/2" fabric square face down...
Place 4 1/2" square batting on top....
***NEXT Place one 4 1/2" fabric square face UP on top of batting. I somehow forgot to get a photo of this step. Sorry. :)
Then take the two remaining 4 1/2" fabric squares to your ironing station, fold in half and press...
Two folded pieces should look like this....
Now lay them on top of your three layer sandwich (square face down, batting, square face up).
The folded and pressed sides should meet each other in the center.....
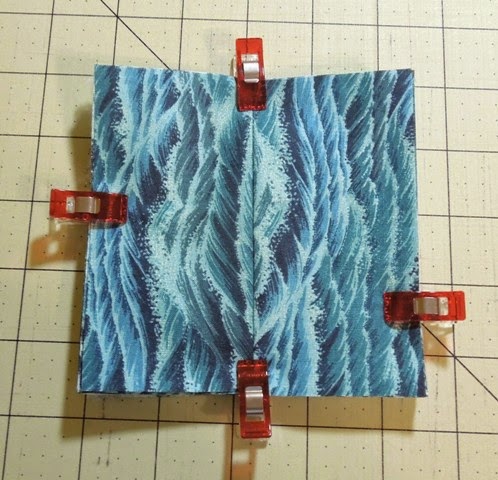
Pin or clip all layers together. (I'm really loving these clips....so much easier to use than pins for projects like this.)
Sew around all four sides with a very scant 1/4" seam....
After it's sewed together, clip the corners just a little (this will reduce bulkiness once we turn the coaster inside out.....
Now turn your coaster inside out and it should look like this.....
To finish, topstitch/sew around the entire coaster using a very narrow 1/8" approximate seam.
Slip the base of your wine glass into the coaster opening.....
The coaster will just stay with the wine glass wherever it goes....isn't this a cute idea?
Just flip it over and now it's a regular coaster suitable for your coffee cup in the morning. When I showed it to my husband, he jokingly asked..."Do you REALLY have to turn it over to use it with a mug?" :) :) :)
I quickly stitched together a set of four to give to my daughter.
WINE GLASS COASTERS
Accuquilt Friendly
For ONE Coaster you will need:
Four - 4 1/2" fabric squares - Accuquilt Die # 55060
One - 4 1/2" square of batting
Lay one 4 1/2" fabric square face down...
Place 4 1/2" square batting on top....
***NEXT Place one 4 1/2" fabric square face UP on top of batting. I somehow forgot to get a photo of this step. Sorry. :)
Then take the two remaining 4 1/2" fabric squares to your ironing station, fold in half and press...
Two folded pieces should look like this....
Now lay them on top of your three layer sandwich (square face down, batting, square face up).
The folded and pressed sides should meet each other in the center.....
Pin or clip all layers together. (I'm really loving these clips....so much easier to use than pins for projects like this.)
Sew around all four sides with a very scant 1/4" seam....
After it's sewed together, clip the corners just a little (this will reduce bulkiness once we turn the coaster inside out.....
Now turn your coaster inside out and it should look like this.....
To finish, topstitch/sew around the entire coaster using a very narrow 1/8" approximate seam.
Slip the base of your wine glass into the coaster opening.....
The coaster will just stay with the wine glass wherever it goes....isn't this a cute idea?
Just flip it over and now it's a regular coaster suitable for your coffee cup in the morning. When I showed it to my husband, he jokingly asked..."Do you REALLY have to turn it over to use it with a mug?" :) :) :)
I quickly stitched together a set of four to give to my daughter.
Until next time! Keep sewing!
Theresa
Wine Glass Coasters Tutorial
 Reviewed by Doctor Smile
on
July 16, 2014
Rating:
 Reviewed by Doctor Smile
on
July 16, 2014
Rating:


No comments: